

QuickBooks Desktop, the most popular accounting solutions software, is a single-user license. The Pro version is capable of hosting five different users and can install on multiple systems. In addition, the QuickBooks Desktop Pro enables storage and hosting of QuickBooks portable company files over a network. You can use the multi-user feature of QuickBooks by following procedures. In this article, we are going to discuss about the complete procedure to Install QuickBooks desktop on multiple systems. So, keep read on!
Possibility of Installing QuickBooks Desktop Pro on Multiple Systems
If you are wondering whether you can install QuickBooks Desktop Pro on multiple systems, you can do that by making some changes to your system. Intuit, the creator of QuickBooks Desktop Pro, has a strict policy regarding installing software on multiple systems. According to the guideline, you can install the single-user license version on your system and a portable device if the account user is the same person.
With the QuickBooks Desktop Pro, you get a license for only five users, but with the Enterprise version of the software, you get an appointment for up to 10 users.
Procedure to Setup and Install QuickBooks Desktop Pro in Multiple Systems
Following are the quick methods in order to install your QuickBooks desktop on multiple computers:
Step 1: Setting Up QuickBooks Desktop
You’ll have to set up QuickBooks Desktop on the server system as it hosts all the company files.
- First, download and install the QuickBooks Desktop Pro on the server system.
- In the “Intuit QuickBooks Desktop Installer” window, select “Custom and Network Install” as the install type.
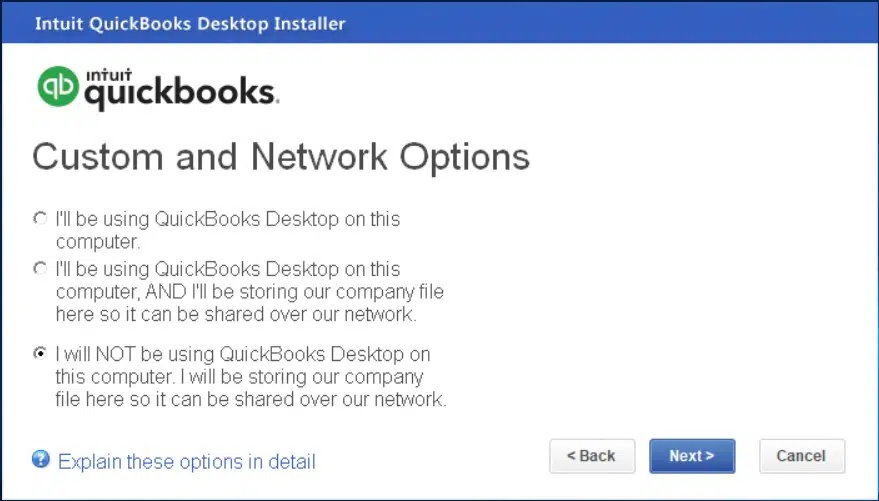
- Next, out of all the “Custom and Network options” available, opt for the “I’ll be using QuickBooks Desktop on this system” option. But if you want the server system only to host the company files instead of storing them alongside, then click on “I will not be using QuickBooks desktop on this computer.”
- Later, complete all the instructions as displayed on the screen and move ahead with the installation.
Map Network Drive in Window
The below-mentioned steps are for all the latest versions of Windows, i.e., Windows 8/10/11.
- Go to the “This PC/My Computer” option or the “Start” menu on your desktop.
- Click on the “Map a Network Drive” option present under the “Computer” option of the “This PC” window.
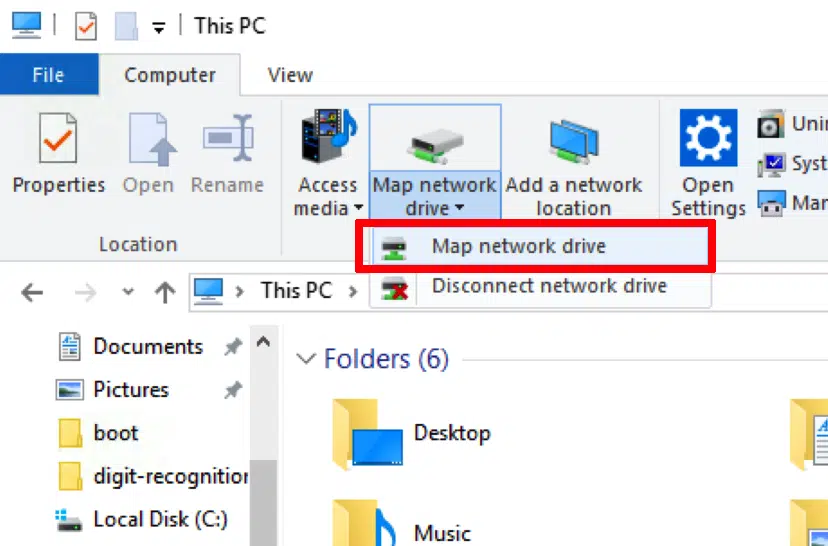
- Opt for any new drive and click on “Browser.”
- Now, move to the “Network Location” where the company file is situated.
- After completing all the steps, click on “OK” & reopen the QuickBooks Company File.
Step 2: Set or Change Folder Permission
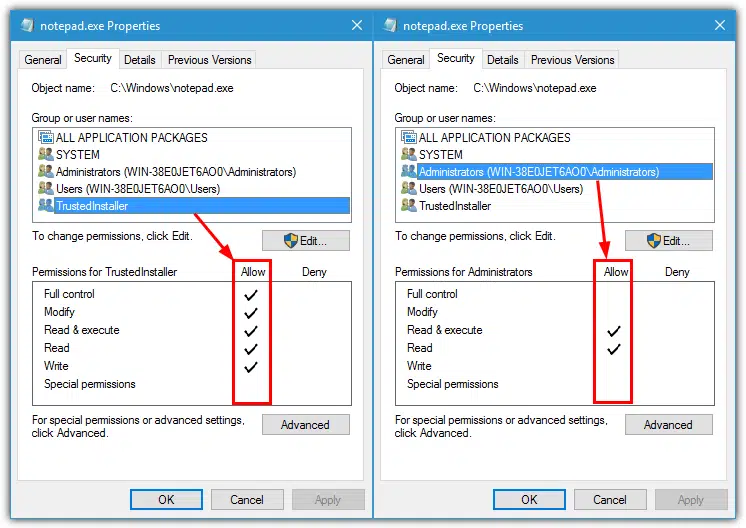
- Right-click on the “Company File Folder” and select the “Properties” option.
- Then, go to the “Advance & Security” tab.
- Choose “QBDataServiceUserXX” and then click on the “Edit” option.
- Check for the settings mentioned below and make sure that they are “allowed:”
- Transverse Folder/File
- List Folder/ Read Data
- Read Attributes
- Read Extended Attributes
- Create Files/ Write Data
- Create Folders/Append Data
- Write Attributes
- Write extended Attributes
- Read Permissions
- Go to the “Start” menu or simply hit the “Windows + E” keys combination & open the “File Explorer.”
- Right-click on the “Folder” containing all the company files.
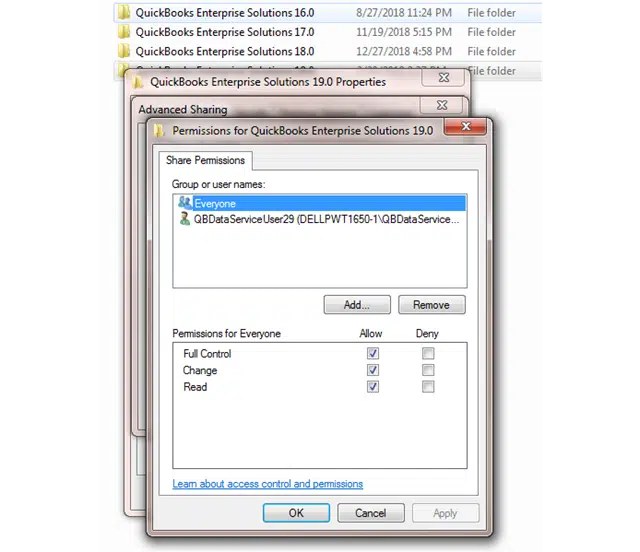
- Opt for the “Properties” option and the “Sharing and Share Add” option.
- Choose all the QBDataServiceUserXX according to the QuickBooks version you are using.
- Change the “Permission Level” to “Full Control” & later save all the changes.
Step 3: Installing the QuickBooks Database Server Manager

- Download and install the “QuickBooks Database Server Manager” to verify the existing setup.
- It will then run a complete system scan to determine where the company files are located.
- After successful scanning, users can share company files with other systems over the network.
Step 5: Using Database Server Manager
After the successful installation of QuickBooks Database Server Manager, you’ll be able to find the QuickBooks Company Files. Post this; you’ll be able to access the files in the folders via a network.
Step 6: Turning on Hosting
First, turn on the server system and then switch on the multi-user server access by following the steps mentioned below:
- Open the “QuickBooks Desktop” app and then go to the “Files” menu.
- Under the “Files” menu and opt for “Utilities.”
- Choose the “Host multi-user access” option and click on the “Yes” tab.
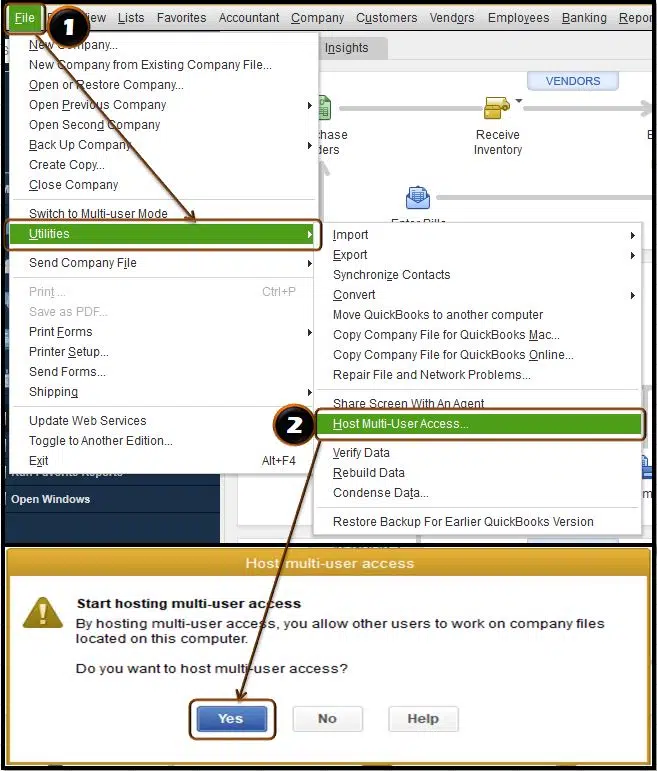
- After making all the necessary changes, you’ll be able to “Host the Company Files” on the network.
Conclusion:
We hope this discussion helped resolve your doubts regarding the multi-user access of the QuickBooks Desktop Pro. Setting up and giving access to the portable company files of QuickBooks Desktop increases efficiency and reduces the overall time of the accounting task.
You can also connect with our QuickBooks desktop support team of experts for consultations if you are stuck at some point while setting up and installing QuickBooks Desktop Pro.


