

Ceramic disk faucets are durable and reliable, but they’re subject to sediment buildup that restricts water flow. For that reason, if you live in an area with hard water and find yourself making repairs a couple times each year or more, you may want to consider a different type of faucet.
You may be able to fix a ceramic disk faucet by cleaning or replacing the neoprene seals, but most often it’s best to simply replace the entire cartridge. If you want to don’t this stuff by yourself then look for best plumber near Sydney to accomplish this task.
This project shows you how to clean the cartridge and replace the seals.
Steps to Repairing a Leaky Ceramic Disk Faucet
1
Shut off the water under the sink, and turn on the faucet until the water stops running.
2
Use a hex wrench to loosen the set screw. Remove the handle.

3
Lift off the decorative cap to access the cartridge.
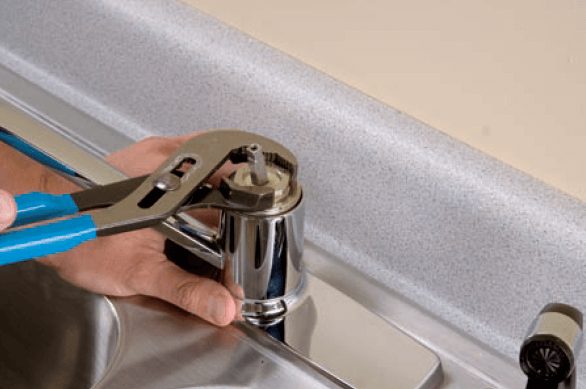
4
Use groove-joint pliers to loosen the cartridge.
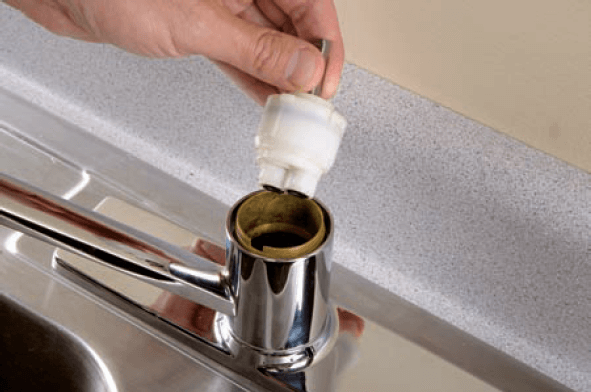
5
Lift off the cartridge. You can usually do this by hand. Use groove-joint pliers if the cartridge sticks.
6
Remove the seals on the bottom of the cartridge with a screwdriver.
7
Clean the sediment buildup off the seals with an old toothbrush. Also clean out the seal seat area with the toothbrush. If you can’t get the sediment and buildup off of the cartridge, replace it.

8
With a screwdriver, remove the O-ring from the inside of the faucet body.
9
Rub silicone grease on the O-ring and seals and reinsert them.
10
Replace the cartridge inside the faucet body and tighten with groove-joint pliers.
11
Replace the decorative cap.
Stuff You Need to Know
Toolbox:
- Hex wrench
- Screwdriver
- Groove-joint pliers
- Old toothbrush
Materials:
- Replacement cartridge (if needed)
Time Needed:
- Less than an hour
Also read,
Thank you for reading an article on how to repairing a leaky ceramic disk faucet. Furthermore, if you want to about anything else then please let us know by commenting below.


